by Cybie

I. Introduction and Guide Scope
The Monk is one of the possible 2nd job advancements for the Acolyte class. Through physical training and spiritual meditation, these combatants make either one of the best damage dealers or sturdiest tankers in the game. Calling upon the help of spirits, they are able to vanquish evil with their fists or maces. Should you choose the zen path and walk the way as a Monk, this leveling guide will be a great supplement to give you an idea on how to begin your journey as one!
This guide will contain the basics of what you need to know about leveling a Monk – which stats to invest in, what monsters to target, what loot to look out for and some possible tips and tricks that you may find useful. Do note that this guide is not in absolution and is not required to follow by the letter. You as a young Monk have free range on how to traverse and explore the ups and downs of your characters, and may this guide at least provide you some options that you may deem beneficial with that.
II. Stat Breakdown
STR: Boosts ATK, Monk’s main DPS stat, and increases max weight limit
AGI: Provides FLEE and ASPD, helpful for normal attack combo Monks and pre-Sky Blow Champions
VIT: Boosts HP, HP RECOVERY, DEF, resistance to STAT AILMENTS and increases healing amount of HP POTIONS
INT: Boosts SP, SP RECOVERY, MATK, MDEF and increases healing amount of SP POTIONS
DEX: Increases HIT, provides minimal ATK/ASPD boost and and decreases VARIABLE CAST TIME
LUK: Increases CRIT, and slightly increases ATK and PERFECT DODGE
III. Possible Monk Stat Builds
A. Rapid Fister
High STR, high to moderately high AGI, mid DEX, mid to low INT
More commonly known as the combo type, this Monk aims to release as many devastating blows in rapid succession as possible. As such, investing a great amount of STR will be necessary. AGI will not just provide the ASPD to proc Raging Trifecta Blows, but also gives FLEE which can help save on heals and potions. A good amount of DEX is required in order for the hits to actually land, while INT is for SP for combo skills or buffs.
B. Finger Investigator
High STR, moderately high DEX, mid INT, mid to low AGI or VIT
This variant calls for a caster-esque playstyle. Utilizing offensive skills such as Throw Spirit Spheres and Occult Impaction, this Monk relies more on the spirits to deal damage. Investing on STR is necessary just as the previous, but instead of higher amounts of AGI, this parameter can be lowered to give way to DEX and INT for cast time and SP respectively. A few points can be added into either AGI or VIT, whichever survivability stat the user prefers.
C. Pure Tank
High VIT, moderately high STR, mid DEX, mid to low INT
Monks have access to the skill Mental Strength (aka Steel Body) which reduces incoming physical and magical damage by 90%. Because of this, some Monks build around that idea and choose to be tankers for their parties. Gaining as much HP and DEF is necessary, thus the high amounts of VIT for this variant. STR serves as an initial damaging stat in early levels, and then later on falls as a stat to increase max weight limit for potions and consumables while tanking. Some DEX is needed to be able to hit monsters while tanking (to avoid them changing targets in some cases) as well as to recast Mental Strength faster. INT not only provides some SP and variable cast time reduction, but also adds a bit of MDEF to help the Monk tank magic-type attacks.
| High: 99-80 | Moderately High: 79-61 |
| Mid: 60-31 | Low: 30-1 |
IV. Gear and KP Preparation (+F2P Options)
Before proceeding with your Acolyte, one may opt to have some items prepared to help ease with leveling. These items are not required, but getting the best amount of EXP possible will definitely be worth the investment. Below is a list of sample gear and consumables that you may consider acquiring beforehand to ease up the leveling process:
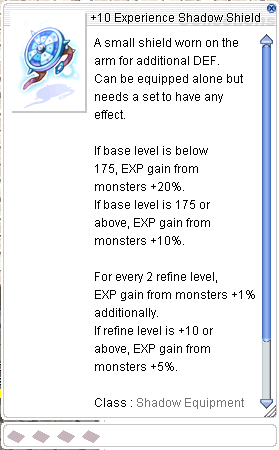
- Beginner (LV1-49), Rookie (Lv50-99) Shadow Sets and Experience Shadow Shield to increase EXP gained from defeating monsters

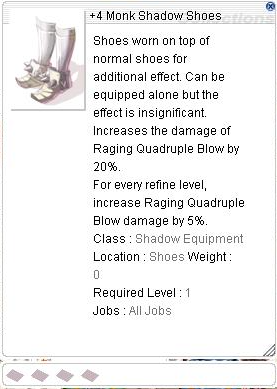
- Class-specific Shadow Equipment (preferably Monk Shadow Set for bonuses on Throw Spirit Spheres, Occult Impaction and/or Raging Quadruple Blow)

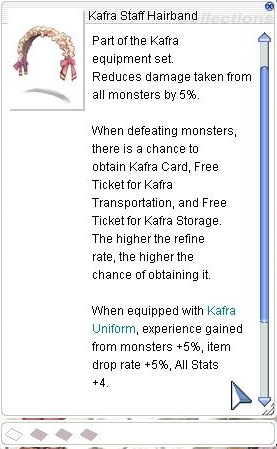
- Equipment which provide +% EXP such as Kafra Uniform/Kafra Staff Headband set, Blue Rear Ribbon, Marin Balloon, EXP Rings from Cash Shop, Footgear with EXP-Race Cards

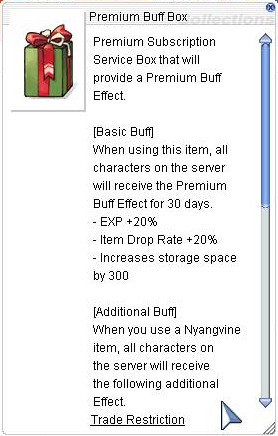
- Premium Buff Box (Increased EXP/Drop Rate and Kafra Storage space for 30 days) + Battle Manual Box (10pcs)
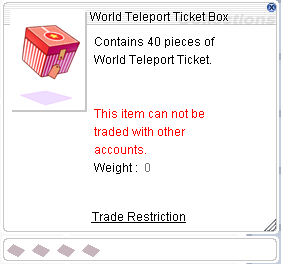
- World Teleport Ticket Box (allows easy access to fields and dungeons without having to traverse long walks or teleports from town; done via World Map or Navigation System, and must be used outside a building)

- HP/SP Sustain (aka leeching) Equipment such as Rideword Hat, Vanargandr Helm, Asgard Blessing, Catherina von Blood, Hunter Fly Card-compounded weapons and HP/SP Absorb-enchanted costumes


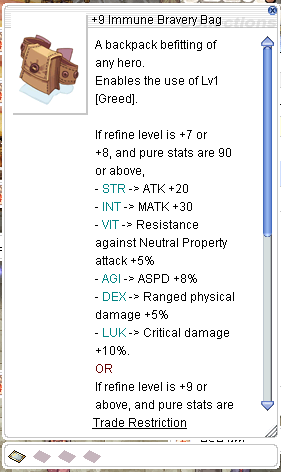
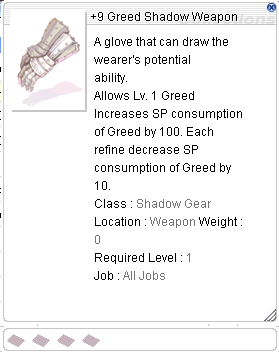
- Equipment which provides Lv1 Greed such as Bravery Bag, Greed Shadow Weapon or Greed Amistr Bag
- Equipment which increases ATK for all-around DPS build or Ranged Damage for Throw Spirit Spheres build


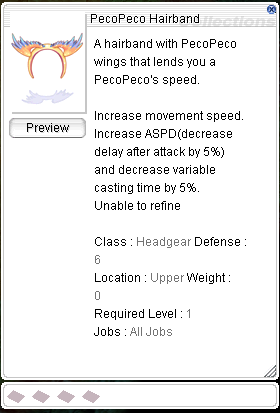
- Pecopeco Hairband for ASPD and Movement Speed (movement speed bonus stacks while mounted, but not with Increase AGI)
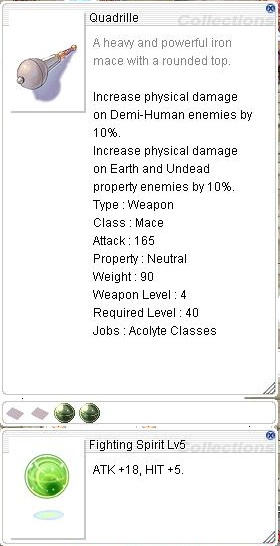
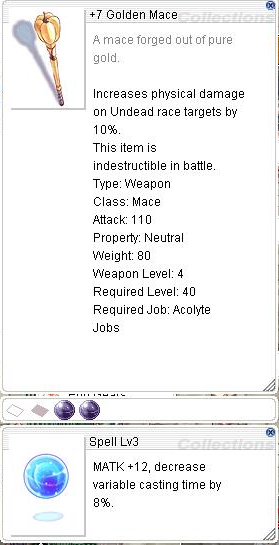
- Hi-ATK Maces/Knuckles like over-upgraded Crimson Mace/Knuckle, or those which provide additional effects


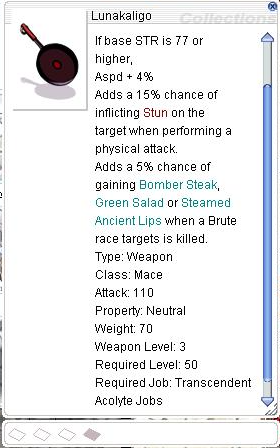
- Maces or Knuckles with Malangdo Enchants (Fighting Spirit for ATK/HIT, Sharp for CRIT, ASPD for Attack Speed or Spell for Variable Cast Time Reduction, depending on leveling playstyle)
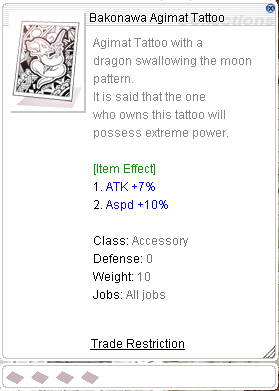
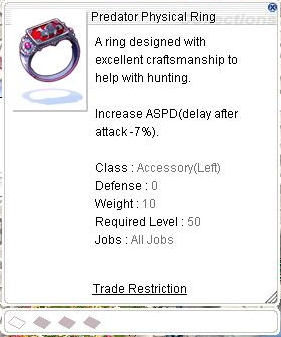
- Physical Enhancer Ring, Angel Egg, Bakonawa Tattoo or any accessory which increases ATK, ASPD, HIT, or any of the six base stats


- Equipment and/or Cards which help in crowd control or survivability (especially for C. Pure Tanker)


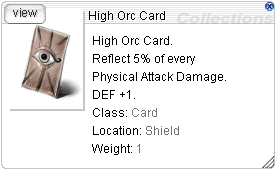
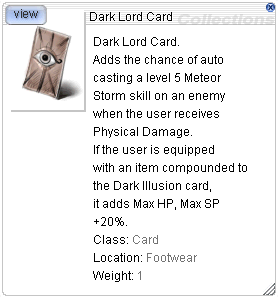
- For Pure Tanker Builds, reflect damage gear paired with autocast gear


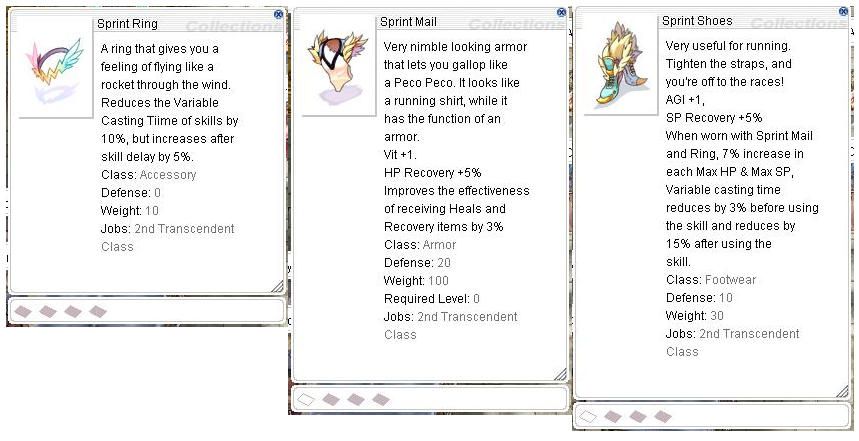
- For Champions, Sprint Set to reduce Variable Cast Time and After Cast Delay
If you are a new player though with limited resources or just want to take the free-to-play (F2P) route, you may go for these viable options:
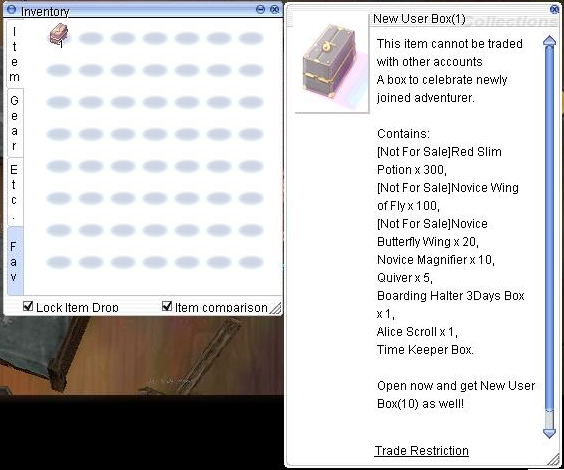
- New User Box (free potions/consumables)
- Time Keeper Equipment and Metal Weapons (also included in the Time Keeper Box from New User Box) which are enough to carry you in the early to mid-game
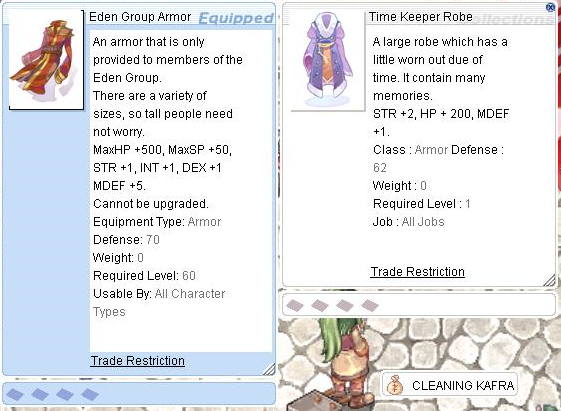
- Eden Equipment Quest (preferably those done within Lv50-59, LV70-79 or Lv80-89 range for easy kill quests)
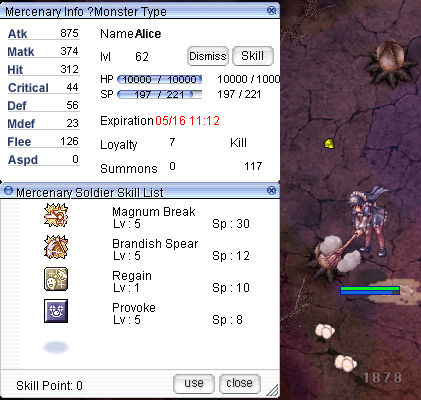
- Alice Mercenary Scrolls (via New User Box) summon an Alice companion to fight alongside you. She can use AoE skills such as Brandish Spear and Magnum Break that can kill multiple monsters at once, making early leveling effective. If you wish for Alice to automatically attack and use skills, consider downloading and setting up AzzyAI in the AI>USER_AI Folder.

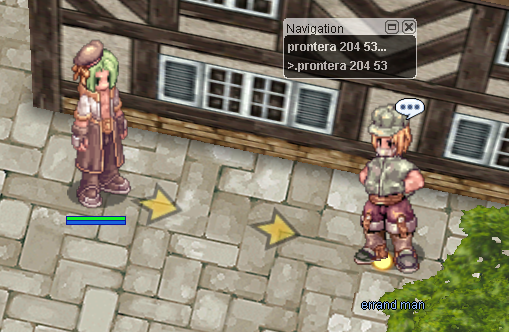
- 5x [NFS] Battle Manuals via Jellopy Quest in Prontera; basically need to bring Jellopy to an NPC located at /navi prontera 204/53 (click to copy the command and enter in game chat)
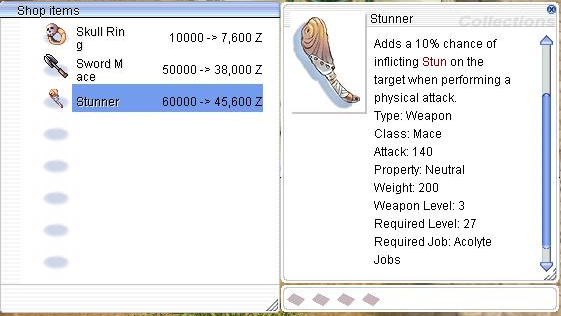
- Stunner from Morroc Trader located at /navi morocc 269/193 (click to copy the command and enter in game chat)
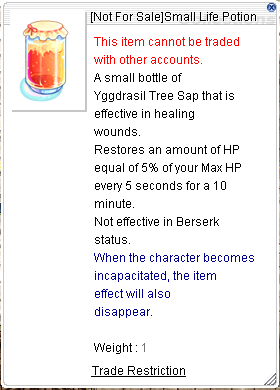
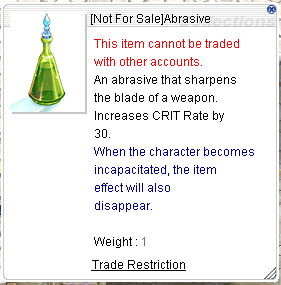
- Event consumables such as [NFS] Small Life Potion, [NFS] Abrasive and [NFS] Almighty (depending on which ones are available in the current patch)

- Account-bound event equipment like Predator Accessories

V. Leveling Guide (Acolyte)
[Lv1 – 10]: Criatura Academy Quest (until receiving Eden Group Mark), Prontera Field (Rocker, Fabre, Lunatic)
Loot Priority: Grasshopper’s Leg, Fluff
 |
[Lv10 – 25]: Ambernite, Pecopeco, Muka, Scorpion, Payon Field (Spore, Boa, Wormtail), Payon Dungeon 1F
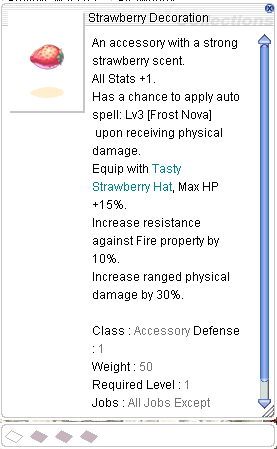
Loot Priority: Snail Shell, Crystal Blue, Bill of Bird, Cactus Needle, Scorpion Tail, Red Blood, Strawberry, Venom Canine
    |
[Lv25 – 40]: Bigfoot, Elder Willow, Thara Frog, Smokie, Ant Hell 1F, Payon Dungeon 2F
Loot Priority: Bear’s Footskin, Honey, Poopoo Hat, Elder Branch, Dead Branch, Red Blood, Resin, Jellopy, Iron Ore, Sticky Webfoot
    |
[Lv40 – 55]: Wolf, Argos, Orc Village, Orc Dungeon 1F, Byalan Dungeon 3F/4F, Comodo Field (Grove, Flora, Alligator), Greatest General, Pyramids B1F, Magnolia, Metaller
Loot Priority: Strawberry, Bug Leg, Cobweb, Orcish Voucher, Emperium, Mermaid’s Heart, Gill, Mystic Frozen, Crystal Blue, Maneater Blossom, Stem, Aloe Leaflet, Anolian Skin, Yggdrasil Seed, Trunk, Brigan, Authoritative Badge, Immortal Heart, Rotten Bandage, Beef Head, Rough Oridecon
           |
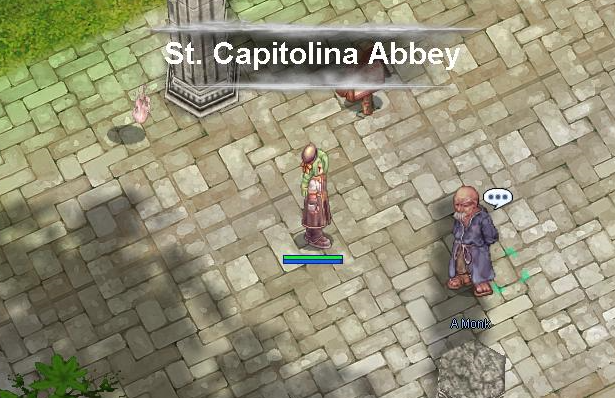
VI. Monk Job Change
Acolytes with Job levels between 40 to 50 can proceed to change into a Monk. It is highly recommended (especially to new players) to level up to Job 50 to waive the entire quest requirement and instantly change your job. Once you’ve decided to change jobs, proceed to St. Capitolina Abbey located at /navi prt_fild03 370/256 (click to copy the command and enter in game chat).

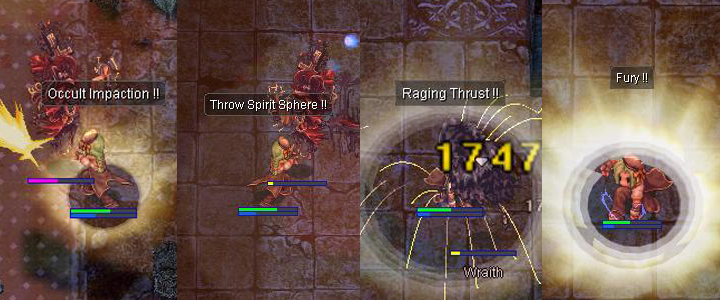
VII. Monk Mechanics
One of the main selling points of the Monk’s kit is the ability to summon and use Spirit Spheres. Each of these glowing orbs rotating around the character provides +3 ATK which ignores FLEE (when doing normal attacks) and lasts for 10 minutes independently. These can also be passed on to party mates as a supportive buff through the Monk platinum skill Spiritual Bestowment.

A good number of the Monk’s skills require these Spirit Spheres in order to be casted – from offensive skills like Raging Thrust and Throw Spirit Spheres, to non-offensive skills like Mental Strength and Fury. Keep in mind the mechanics of these skills when leveling while maintaining uptime for your spheres.
Due to the prerequisite skills in the Acolyte Tree, Monks and Champions naturally gain benefits when fighting Demon and Undead races. Having a slight increase in soft DEF as well as dealing additional damage to them can help speed up the leveling phase of one’s character. The following leveling guide for Monk will include maps or monsters in bold text, indicating that these are either of Demon or Undead races.
VIII. Leveling Guide (Monk)
[Lv55 – 70]: Orc Dungeon 1F/2F, Pyramids 4F, Payon Cave 3F/4F, Geffen Dungeon 2F, Mantis, Geographer, Sidewinder, Tamruan
Loot Priority: Zenorc’s Fang, Orc Acolyte Bow, Shining Stone, Rough Elunium, Rough Oridecon, Panacea, Rotten Bandage, Memento, Scale Shell, 3carat Diamond, Black Hair, Horseshoe, Oridecon, Maneater Blossom, Maneater Root, Venom Canine, White Herb, Destroyed Armor, Mystic Rune
        |
[Lv70 – 85]: Juno Field (Goat, Grand Peco, Harpy, Sleeper), Brasilis Field, Petites, Einbroch Field (Porcellio, Noxious, Pitman), Stem Worm, Glast Heim St. Abbey (Wraith, Evil Druid), Clock Tower B4F, Louyang Dungeon 1F
Loot Priority: Antelope Skin, Peco Peco Feather, Wind of Verdure, Mastela Fruit, Gold, Harpy Feather, Harpy Talon, Izidor, Great Nature, Sand Clump, Grit, Rough Oridecon, Elunium, Headless Mule Card, Crimson Katar, Crimson Knuckle, Dragon Tail, Dragon Scale, Dragon Canine, Petti’s Tail, Crimson Mace, Iron Ore, Iron, Insect Feeler, Lantern, Steel, Coal, Used Iron Plate, Grit, Tattered Clothes, Rough Elunium, Old Blue Box, Yggdrasil Seed, Maneater Root, Witch Starsand, White Herb, Old Broom, Fabric, Red Gemstone, 2carat Diamond
          |
[Lv85 – 95]: Stapo (preferably in hitters party), Glast Heim Underground Prison, Dark Priest, Demon Pungus, Magma Dungeon 1F, Rachel Maps, Geffen Dungeon 3F
Loot Priority: Jellopy, Green Live, Maneater Blossom, Maneater Root, Stem, Mandragora Flowerpot, Drosera Tentacle, Elunium, Oridecon, Rotten Bandage, Red Gemstone, Steel, Brigan, Cyfar, Izidor, Witched Starsand, Yellow Gemstone, White Herb, Lava, Mastela Fruit, Burning Heart, Glacial Heart, Ice Cubic, Crystal Blue, Wind of Verdure, Venom Canine, Scale Shell, Rough Oridecon, Crimson Mace
     |
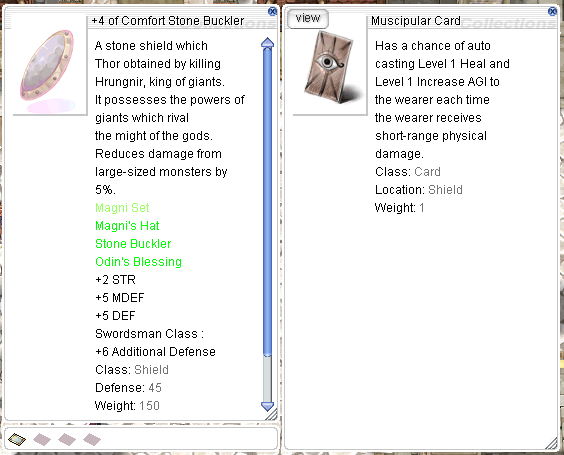
[Lv95 – 99]: Magmaring, Muscipular, Medusa, Magma Dungeon 2F (via party), Nifflheim Fields
Loot Priority: Burning Heart, Maneater Blossom, Maneater Root, Mandragora Flowerpot, Stem, Pearl, Burning Horseshoe, Dragon Tail, Dragon Scale, Dragon Canine, Dragon Skin, Little Evil Horn, Dead Branch, Elder Branch, Dullahan Armor Piece, Tangled Chains, Honey, Rough Elunium, Rough Oridecon
     |
IX. The World Bounty Repeatable Quests and Boong Boong Drinks

Introduced in the Sept 2023 patch, World Bounty is a set of repeatable quests the player can accept, turn-in and reset in order to speed up the leveling process than just normally grinding monsters or doing Eden’s Daily Mission Board Quests. In various cities and towns, the NPC Magical Boy will teleport you to maps with bounty boards available, depending on your current location, at the cost of Boong Boong Drinks. These can be bought at the fixed cost of 100z from the Boong Boong V. Machine nearby. It is advised to bring a couple of them if you wish to grind for a good amount of time in bounty maps (around 500-1000), or have them in your storage which you can access via Kafra Card or Kafra Bell.
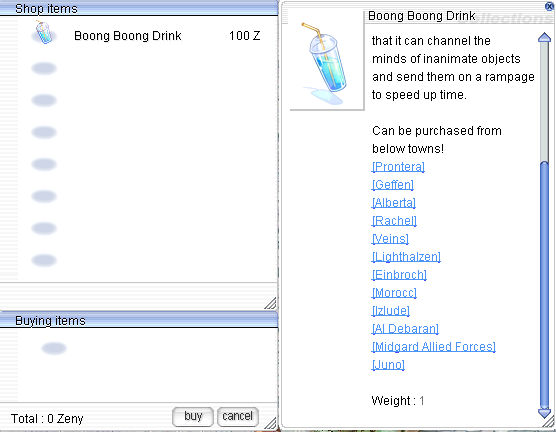
These drinks can also be used to reset the quest cooldown of bounty boards when you have finished turning in your quests. Depending on the bounty, simply talk to the board and bring the correct number of Boong Boong Drinks to refresh the cooldown. Afterwards, you may accept the bounty quest and kill monsters once again. More details about the World Bounty System may be viewed through the link below:
X. Rebirth / Transcending via Escaped Book Quest
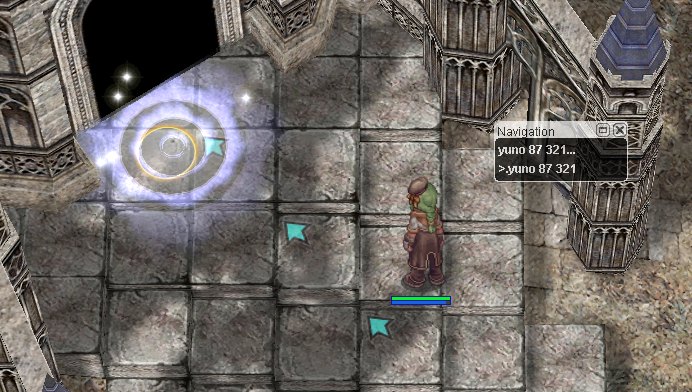
Once you have reached Base Lv99 and Job Lv50, proceed to Juno where you can rebirth or transcend into a High Novice. Make your way to the Sage’s castle /navi yuno 87/321 (click to copy the command and enter in game chat) and find Metheus Sylphe.

He will give you an option to either donate some Zeny or do a simple monster-hunting quest (Escaped Book) in order to transcend. More information may be viewed via the Free Transcending Guide:
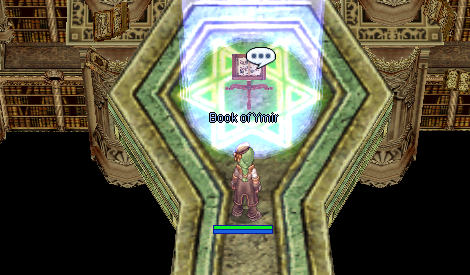
Once finished, he will direct you to walk north towards the Book of Ymir which will teleport you to Valhalla.
Before speaking to the Valkyrie NPC who will change you into a High Novice, make sure that you are below 500 weight, have no remaining skill points and not on a mount via Boarding Halter. Once you have transcended, it’s all a matter of following the leveling guide once again until you max out as Champion.
XI. Possible Champion Stat Builds
A. Pre-Sky Blow Path
High STR, high to moderately high AGI, mid DEX and INT
Similar to the combo-style Monk, this Champion variant builds its stats towards having high amounts of STR and AGI, with the latter being a key stat to increase the damage of Sky Blow, an AoE offensive skill used for leveling once the Champion changes into a Sura. DEX is still needed to be able to hit targets, and more points invested in INT will not just help increase SP pool but also give higher recovery from Heal.
B. Pre-Lightning Rampage Knuckle Path
High STR, moderately high VIT and DEX, mid to low INT
Champions who prefer using Throw Spirit Spheres in their leveling playstyle usually take this path, as the Sura skills Lightning Ride, Rampage Blast and Knuckle Arrow also count as physical ranged damage. As per usual, investing high amounts of STR will be needed to deal high amounts of burst damage. Higher points in DEX means faster casting time of Throw Spirit Spheres, and higher points in VIT calls for better facetanking of monsters if necessary. INT will help with the cast time, as well as provide a good SP pool for casting skills.
C. Pre-Gates of Hell Path
High STR and VIT, mid DEX, mid to low INT
Gates of Hell is an offensive skill which takes into consideration the Sura’s HP to deal damage, being an effective killing skill in WoE and PvP scenarios. Tanker-type Champions consider taking this variant as the stat build lines up towards that progression. High amounts of VIT and STR guarantees the tanking Champion under Mental Strength has enough DEF and HP (bonus help from transcended class increased max base HP), as well as carrying more potions. Points into DEX and INT are again for HIT, variable cast time reduction and SP.
XII. Dual Client Partymates (Optional)

While trying to level a Monk or Champion regardless of build, having some other characters to assist them can be helpful. Though not necessary when leveling, these can complement some aspects which Monk classes need a nudge on. Here are some optional classes to have in an alternate account should you decide to help boost your Monk or Champion’s leveling experience:
- Priest (for additional buffs such as Impositio Manus/Aspersio from Priest, Assumptio from High Priest and Expiatio from Archbishop)
- Any AoE DPS character (for leeching or carrying your Tanker-type Monk or Champion; preferably Wizard classes, Sorcerers, Rune Knights, Rangers or Geneticists)
- Soul Linker (for Monk Spirit benefits like Raging Thrust becoming a 5×5 AoE, reduced SP cost of combo skills and SP regeneration while under Fury)
- Sage (for elemental endow skills) / Scholar (for SP Battery)
- Blacksmith (for offensive buffs like Power Thrust and Adrenaline Rush when using Mace-type weapons)
XIII. Additional Tips and Tricks
A. Cast Absorb Spirit on monsters to get a chance to regain SP if Blue Herbs or other SP-replenishing means are unavailable. Preferred targets are those that are immovable like Geographers and Muscipular, as well as non-aggressive, non-Cast Sensor monsters to avoid unnecessary aggro.
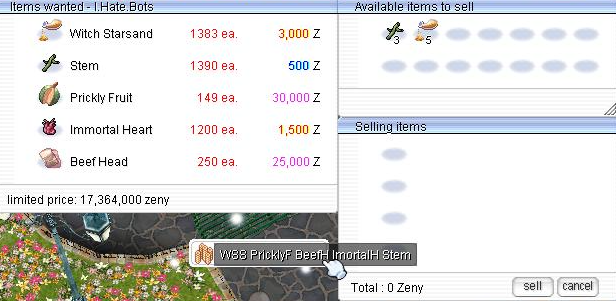
B. Keep a lookout on some important loot that you can sell at a fair price to players looking for them (refer to the items listed at the different leveling brackets above). These are either used by other classes as catalysts for their skills or as items for BQ turn-ins.
C. Besides being under a Soul Linker’s spirit buff, Monks naturally do not have access to Area-of-Effect offensive skills, which can make mobbing quite overwhelming. One may consider picking up the Monk platinum skill Excruciating Palm which deals damage to a single target while knocking back and giving a chance to stun other nearby monsters. This way, you can finish off one opponent at a time without having to tank all of them at once.
D. Before transcending your Monk into a High Novice, hoard and do one run of BQ Lv70 to 90, and turn the quests in once you reach Lv70 as Champion. Unlike Word Bounty Repeatable Quests, you can interact with Eden Mission Board Quests at a much lower level requirement. Doing so will give you an insane amount of EXP (especially when increased with Battle Manuals and server’s EXP Boosts), raising your level to around Lv80+ and making you skip a whole lot of grinding.
E. Some skills like Summon Spirit Spheres and Throw Spirit Spheres have uninterruptible cast time, thus not requiring the Monk or Champion to equip a Phen-effect item. Having this knowledge in mind can help you in some emergency cases, such as using Summon Spirit Spheres instead of Zen before using Snap away in a no-Teleport Zone dungeon or instance.
XIV. Epilogue
“The hand is the tool of tools” as Aristotle once said. The possibilities are endless when we choose to use it for good. We hope this guide has become informative to you, and that you have become more knowledgeable on how to effectively progress with leveling your Monk or Champion. Should you have any questions, please leave a comment below or visit us over at the GGH Discord. Best wishes and happy leveling!
Special thanks to lienger, Cai and Yuri_08 from RO GGH Discord for sharing their knowledge on the class and making this guide possible.
Was this helpful?
2 / 2

Finally, a Monk/Champion guide. Hope you could make a Sura guide to. This is very useful indeed.