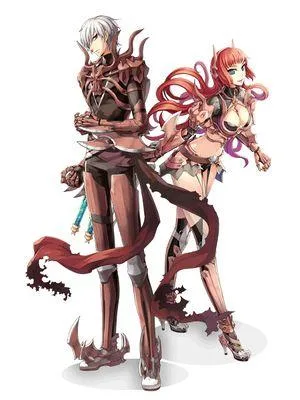
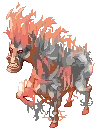
Class Description
Guillotine Cross, GX as commonly referred to by players, is one of the most versatile characters in the game. Despite the flexibility of the character, limited 3rd job skill points, weapon options, and overall availability of items can hinder the progression of a GX.
In order to address these issues, you must prioritize the most important aspect of your character, which is your LEVEL. There are several builds for GX but everyone should take the same path at the start, which is the Rolling Cutter Build. Rolling Cutter (RC) is the cheapest and the most reliable way to level a GX from level 100 to max. Most characters cannot level solo from the start but it’s a different story for GX. We excel in leveling alone, even faster than large parties at times.
ROLLING CUTTER BUILD
If you are still undecided about your build, you may start distributing your 3rd job skill points to only Rolling Cutter and New Poison Research, to some extent, Cross Ripper Slasher, as these skills will help you in leveling and doing your boards quests.
Stat build at level 100 should look like this:

If you are wearing a +9 Bravery Bag[1] you may distribute it like this:

Do not compromise your build by reducing your vit and luk to 1. You’ll benefit more from luk and vit this way as those two will improve both your survivability, hit rate, damage and evasion.
Rolling Cutter Equipment Guide
Rolling cutter is a small aoe (5×5 cells) skill that deals 3x your physical attack damage. This simply means that the leveling strategy will be focused on killing multiple monsters at the same time. In doing so, hp absorb, attack damage, and survivability should be addressed properly.
HEADGEARS
UPPER

Rideword Hat[1] – This should be your best choice for headgear as it Has a 5% chance to recover 8% of your damage as HP, and a 1% chance to recover 4% of your damage as SP, when doing a physical attack.
MIDDLE

Sigrun’s Wing – increases your aspd by 1. The higher the aspd, the more RC’s you can do overtime.
Blinker/Dark Blinker – Offers immunity to blind. Dark blinker gives a slight resistance to stun.

Scuba Mask – gives +5 atk. Gives +10 perfect dodge when combo’ed with Surfer Suit[1].


Any slotted midgear -Magical Booster and Crimson Booster are the cheapest options while Baby Deviling[1] and Black Devil’s Mask[1] are the expensive ones.
LOWER


Blue Rear Ribbon/Marin Balloon/ Poring Balloon – increases your experience gained from monsters by 5% and item drop rate by 5%. Don’t look for other lower gears as they offer minimal stats, some may give aspd but are extremely pricey.
CARDS
Marduk Card – offers immunity to silence status. Silenced = no RC. Can also be remedied by green potions.
Deviruchi Card – offers immunity to blindness and adds 1 str. Blindness will reduce your hit rate and evasion, which most of the time is fatal, as you are tanking a lot of mobs.
Dark Pinguicula – increases your atk stat by 10. Improves your damage a bit.
Corrupt Life card – use this if you intend to utilize the cards it combos with.
ARMOR

Nab’s Cloth[1] – can be enchanted with FS FS FS for additional damage or at least get 2 FS enchants

Kafra Uniform[1] – an expensive option but a reasonable one as it increases the exp and drop rate gained.

Predator Mail[1] – cheap option since it is an event item and gives 800 hp and 100 sp. Useful for all around farming and grinding. Even at +0, this is still a decent choice.

Surfer Suit [1] – when combined with scuba mask, gives +10 perfect dodge which is very useful in dealing with multiple mobs.

Frozen Breastplate [1] – slotted water armor

Harden Breastplate[1] – slotted earth armor
CARDS
Elemental Cards like Bathory, Pasana, Dokebi, Evil Druid are must haves. Try your best to complete the elements for future instances but for early levels, Pasana and Evil Druid or Bathory are necessary to work your way to lvl 140.
Porcellio Card – a decent choice for your base armor. If there are no threatening elemental magic from the mobs that you are clearing, wear Porcellio for extra damage.
GARMENT

Nab Hood – combo item of nab’s cloth. You’ll get a decent amount of atk wearing the whole set.

+7 or +9 Bravery Bag[1] – the best all-around garment for GX as it gives ATK, ASPD, and damage reduction, plus the utility provided by Greed skill is immense. Greed allows you to pickup multiple items around you.

Predator Manteau[1] – combo item for predator set. Not much value outside of the +10 flee but is a cheap option for a slotted garment. The only redeeming effect of this manteau is if it is partnered with predator mail[1], it will decrease your after cast delay by 5%.

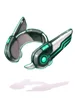
Oxygen Tank[1] – gives +12 flee. Increases flee and hit by 1 per refinement level. Gives an additional +1 aspd when worn with Scuba Mask.

+9 Fallen Angel Wing[1][FS/FS/FS] – the garment with the highest atk. An expensive choice for a slotted garment.
CARDS
Raydric Card – allows you to mob more monsters because of the neutral damage reduction. Good to have in case you are experiencing difficulties in tanking damage.
Wakwak Card – great damage card that gives 5 atk for every 10 str. At 100 str, you’ll get 50 atk. Wear this if you are confident with your current lifesteal rate and your ability to take damage.
Orc Baby Card – wear this if you have a corrupt life midgear. If you don’t have one, stay away from this as raydric is better.
FOOTWEAR

Ancient Hero Boots – provides 500 hp and 50 sp at +0. At +9, you’ll get 6% more hp and 3% more sp. Indispensable if you are wearing a Blade Katar[1].

Nab Shoes – can be enchanted with FS FS FS, but and 2 FS is still acceptable. This is also a part of the Nab’s set. Can be worn without the set since the FS enchant is still valuable. Best worn with Thanos Katar[1].

Predator Boots[1] – Great source of aspd for a cheap item. At +0, it decreases atk delay by 5%. At +6, it decreases the atk delay by 11%. When refined to +9, decreases the atk delay by 13%. Also, it is part of the predator set. Unfortunately, their combo that provides 7% after skill reduction is only available if all of them are at +9.
Variant Shoes – provides 20% hp and sp but is extremely expensive.
Enhanced Variant shoes[1] – provides 12% hp and sp. Gives more defense as the refinement increases.
CARDS
Firelock Soldier Card – use this when you have a +9 footwear. The HP and SP bonus won’t trigger for boots with refinement below +9.
Matyr Card – decent choice for 10% hp and 1 agi.
Verit Card – gives 8% hp and sp. When combo ’ed with Corrupt life card, gives additional 4% hp and sp for a whopping 12% hp and sp without requiring any refinement level. Enhanced variant is a good option to improve its innate hp and sp bonus from 12% to 24% hp and sp.
Wild Rose Card – gives 1 agi, and an additional +5 perfect dodge when worn by Thief class.
ACCESSORIES
Bakonawa Agimat Tattoo – gives 10% aspd and +7% atk. What’s not to like. Can be worn at lvl 1. Best when worn with a high atk, high refine weapon.

Rogue’s Treasure – Gives +10 atk and crit when your agi is at 90, and +10 flee and hit when your str is at 90. A good choice for characters having issues with hit rate. Best for new characters, lvl 100 GX’s and accounts without premium buffs. You can wear 2 Rogue’s Treasures if you want.
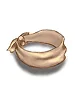
Predator Physical Ring[1] – Gives a decent amount of aspd and has a slot. Can only wear 1 at most.

Nab Ring – the final part of the nab’s set. Gives +10 atk.
Assassin Handcuffs[1] – combo accessory for Krishna to increase your atk by 50. Also, reduces your flee by 30.
CARDS
Creamy Card – allows the use of lvl 1 teleport though flywing is a better choice due to the after cast delay of RC.
Yoyo Card- gives 1 agi and 5 perfect dodge.
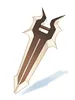
Weapon

Blade Katar [2] – Currently the best weapon for rolling cutter in the game. In terms of damage and utility, this weapon is top notch. Can also be comboed with Ancient Hero Boots [1] to trigger its bonus damage. Which also means that this weapon is extremely expensive. It also requires you to refine it to at least +9 before you can unlock its beastly potential.

Thanos Katar [1] – 2nd best Katar in terms of damage. Can be enchanted using gray abrasives and has the chance of dealing more damage against specific monsters compared to Blade Katar [2] but requires extreme luck in enchanting since it is random. In terms of utility, it provides a Rideword-esque effect which gives you HP absorb, and SP absorb. Best partnered with Hunter fly Card or Abysmal Knight card only if you happen to get boss specific enchants.
Blood Tears [2] – 3rd best Katar in game in terms of rolling cutter damage. Can be enchanted with 2 Fighting Spirit enchantments. Try to get this to at least +9.
Krishna [2] – 3rd best option in terms of raw damage. Unfortunately, you have to use an Assassin Handcuffs [1] to unlock its damage potential.
Jur [3] or Specialty Jur [4] – These 2 weapons have the lowest attack among the options but has the slots to utilize more hunter fly cards.
CARDS
Hunter Fly Card – the best card for RC build as it allows you to gain hp as you deal damage. The number of hunterfly cards matter since its effect is additive.
Desert Wolf Card – Wear this if you are using a corrupt life card. Commonly used in conjunction with blade katar to boost the damage against all monster sizes. Remember, the combo only works once. So, make sure to add a Hunter Fly card to your weapon’s 2nd slot.
Abysmal Knight Card – equip this if you intend to deal more damage vs boss monsters.
Shadow Gears
Promotional Set- this gives +3 to all stats and should suffice your need for shadow gears
Malicious Set – one of the best leveling shadow equips as it improves your current setup’s hp absorption rate. If you are new to the game, this one is very expensive.
Spiritual Weapon + Accessories Set – mostly used in combination with malicious set. Improves your SP absorption rate. Not as popular as malicious so this is a lot cheaper than malicious set.
Power Shadow Accessories Set – this set gives extra attack and str, increasing your overall damage. Commonly used by people wearing malicious set.
Critical Shadow Set – Critical Shadow Weapon gives +10 atk at +0. If the total of the refinement level of the weapon and the armor is +15, the set will give you at least 25 atk.
Physical Shadow Set –Provides the highest atk among the available shadow sets and adds a small amount of aspd but it comes with a very high price.
Almighty Accesory Set – adds +1 to all stat per refine level. If both the earring and the pendant is +10, adds +20 to all stats. Price is astronomical.
Leveling Guide
Each leveling spot is chosen based on the number of monsters present in the map. Also, please remember that it is close to impossible to solo level to 175 without relying on your expensive skill Enchant Deadly Poison.
Level 99-100 (Magmaring)

Hunt Magmaring at ve_fild03. After your 3rd class job change, try to gain some job levels first. Make sure to assign your first 5 skill points to Rolling Cutter. Grinding here should be easy. Leave as soon as you get the skill points necessary.
Level 100-115 (Magma Dungeon Level 2)


Grind your levels at mag_dun02. This dungeon has a lot of monsters, and you’ll gain some Zeny while leveling. Bring hundreds of yellow potions and blue herbs to assist you in grinding. Your damage at the start won’t be able to sustain you 100% but don’t get discouraged. Things will be better once you gain more levels and equips. Test the number of monsters you can manage in one go then once you get used to it, you’ll be racking up levels in no time.
Level 100-115 (Bangungot Hospital)


Grind your levels at ma_dun01.This is an alternative grinding spot for players with decent gears and premium buffs. Complete the quests Cautious Village and Nurse in Port Malaya to gain access to this dungeon. If you have access to a level 100 Archbishop, you can increase your rolling cutter damage by buffing yourself with Aspersio since all of them are weak versus the holy property. Monsters in this map have high flee rate and requires around 380 HIT to hit them consistently. If you can’t cover the required hit rate, stay away from this map.
Lastly, don’t sell your loots to the NPC as most of them, if not all, are quest items. Check the Port Malaya daily quest to determine which loots are worth keeping.
Level 110-120 (Juperos)


Grind your levels at juperos_01. Your hit rate should be at around 370-400 to consistently hit the mobs here. Venatu and Dimik come in bunches, so you better be careful in luring them. Also, these monsters can blind you, reducing your hit rate and evasion, so make sure to wear your anti-blindness midgear or prepare tons of green potions. Make sure to distribute a decent amount of vit (at least 50) since the monsters here can stun you, making your flee stat useless and stops you from attacking. As much as possible, stay away from Dimiks or if you have no choice, target them first as they are ranged units.
Level 115-130 (Cursed Abbey)


Grind your levels at abbey02. A backdoor access is available through Acher at ve_fild07 near the boat. Prepare your Bathory armor to make yourself immune from Banshee’s dark soul strike. Also, reduces the damage taken from the darkness attack of the other monsters from this map. Prepare your anti-blindness midgear or your green potions. If possible, bring fire converters or Aspersio scrolls with you. If you have a slave endower, or a slave Archbishop, you can buff yourself with Aspersio. Stay away from Fallen Bishop Hibram, the map’s MVP.
Level 115-130 (Rachel Sanctuary)


Grind your levels at ra_san01. A backdoor access is available through Eridanus at ra_temple. This is an alternative map for leveling to 130. Make sure to prepare your anti-silence equipment or bring green potions to remove the silence status.
Level 115-130 (Abyss Lake)


Grind your levels at abyss_03. This map requires 1 dragon canine, 1 dragon tail, and 1 dragon scale to enter. Consider maxing your skill New Poison Research as you must use your Enchant Deadly Poison skill to grind in this map. If you wished to boost your levels quickly, this is the place to go. Prepare your fire armor to reduce the damage taken from fireball. Make sure to stay away from Detarderus, the map’s MVP.
Level 125-140 (Scaraba Hole)


Grind your levels at dic_dun02. This map requires several quests to gain access to namely Ring of the Wise King, Sapha’s Visit, and Doha’s Secret Orders. Scaraba’s are weak to fire property so consider using a converter or use a slave endower. Utilize Enchant Deadly Poison to help you clear the monsters from this area. Stay away from Queen Scaraba, the map’s MVP.
Level 135-175 (Bifrost Tower)


Grind your levels at ecl_tdun01. Monsters here drop expensive loots that you can sell to the NPC. Keep the Yggdrasil Dusts as they are quite useful in removing certain debuffs. Prepare your Frozen Breastplate [Marc] to reduce the heavy damage taken from water spells of Lichtern(blue). Prepare some earth converters to endow your weapon since Cenere is weak against it and it will allow you to hit the ghost property monster, Lichtern(yellow).
Alternatively, you can do World bounty board quests:
Stats Distribution
| Level 100 | Level 115 | Level 130 | Level 150 | Level 175 | |
| STR | 80 | 90 | 90 | 100 | 120 |
| AGI | 80 | 90 | 90 | 97 | 100 |
| VIT | 40 | 52 | 75 | 90 | 92 |
| INT | 1 | 1 | 1 | 1 | 1 |
| DEX | 60 | 70 | 90 | 90 | 90 |
| LUK | 30 | 30 | 30 | 60 | 90 |
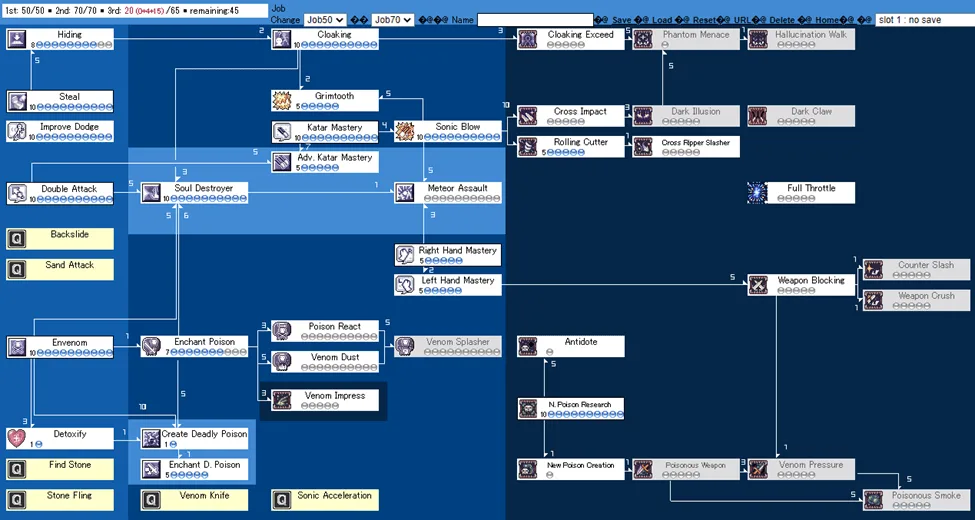
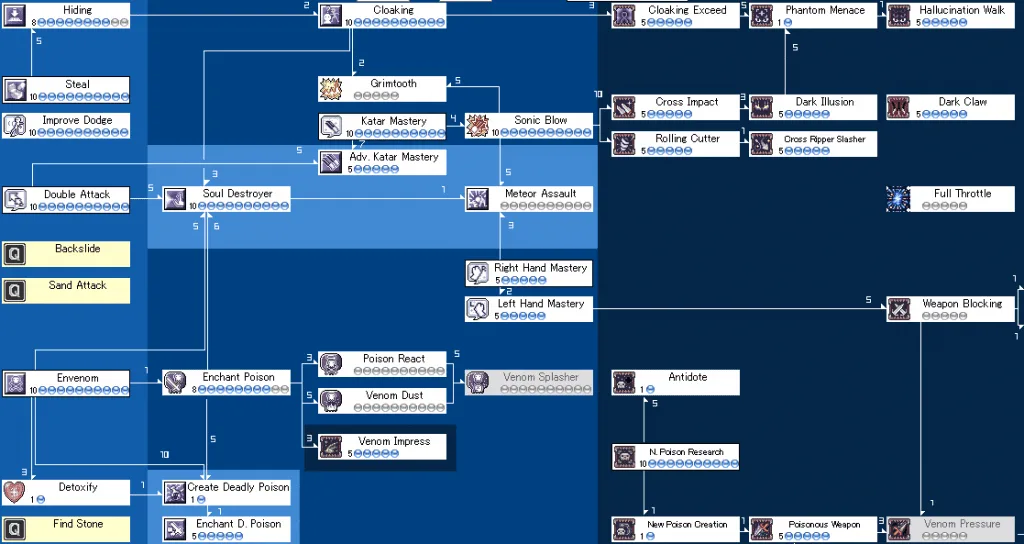
Skill Points Distribution
Reminder
Make sure to complete your boards quests daily. You can get them at eden first floor. Thoses quests offer a lot of exp and will help you reduce your expenses for poison bottles on your daily grind.
Also, you may still tweak the build especially with stat distribution and skill points. Feel free to explore your character while you level it. You are the best person to identify which category you are having difficulties in. So tweak to your heart’s content. Good luck to your journey in ROGGH.
Shameless Plug
If you have questions regarding this guide, kindly visit our Facebook page at www.fb.gg/rkmph.gaming. You may send a message or visit us during our live streams.
Was this helpful?
34 / 3